Create Party Favors for any Occasion

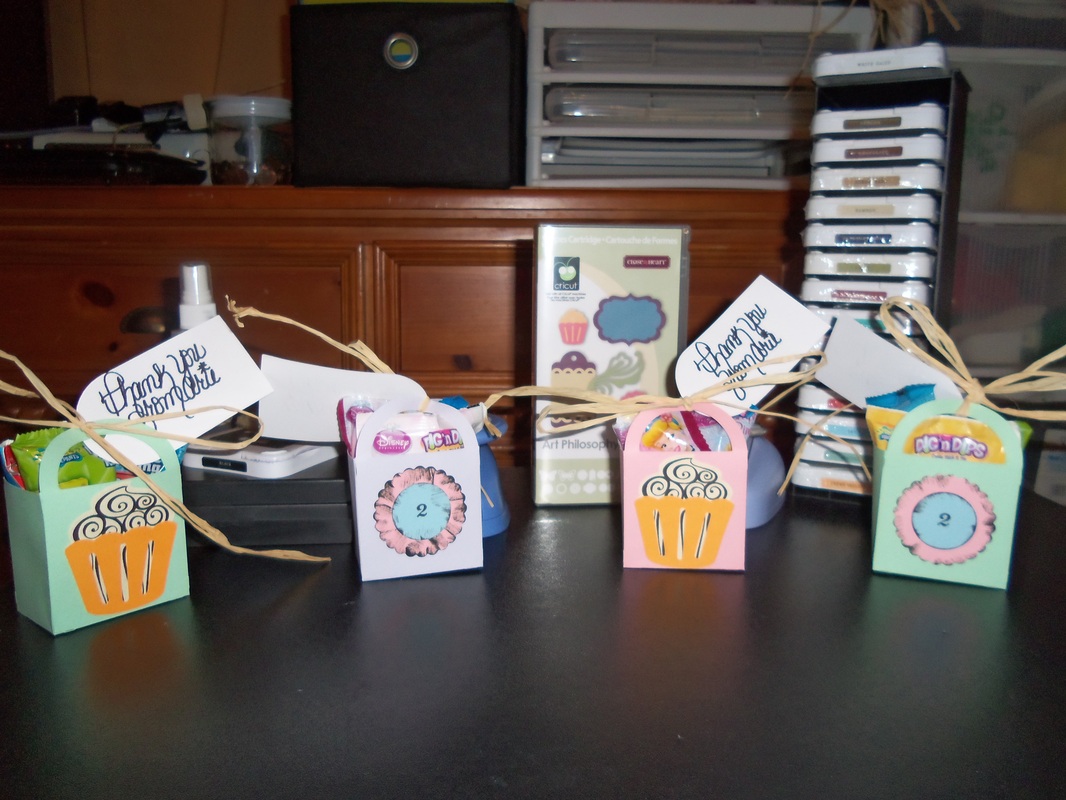
Learn how you can create these cute little favors and customize them for any theme or occasion. The directions are listed below the picture. Happy Scrapping!!
Directions:
1. Using the Cricut Art Philosophy cartridge only available from Close to My Heart, select Shift Key Lock button and then select font layer on. Next you will select <Star 1> and repeat the <Star 1> entry until you have entered the number of goody bags you want. Set your size dial to 5" and then cut out the goody boxes. Once the machine has stopped cutting be sure to carefully remove the items from the Cricut mat.
2. Next set the size dial to 2 1/2" and deselect the font layer feature. Be sure that the Shift Key Lock is still engaged. Using the same cartridge as before, we are going to cut the desired number of cupcakes and cupcake overlays. For the cupcakes select <cupcake> and repeat this entry until the desired number of cupcakes are cut. Then for the over lay be sure to select the layer feature and cut the desired number of cupcake wrappers/overlays.
3. Next select the cupcake stamp from the Celebration stamp set that came with your cricut cartridge and place on your acrylic block. Be sure to season your stamp before proceeding. Taking the mounted stamp and placing it on the CTMH Exclusive inks in black do the following motions: tap, tap, twist, twist. Then stamp each of the cupcake cutouts.
4. Next using CTMH bonding adhesive, adhere the cupcake wrapper/overlays to each of the cupcakes once the ink has dried.
5. Then utilize the CTMH 2" scallop punch to decorate the other side of the goody bag. Next cut the desired number of circles with the CTMH 1 1/4 circle punch.
6. On these goody bags I stamped the number 2 to represent the age of the special little boy these bags were made for, but you can decorate however you please. Afterwards be sure to ink distress both the scallops and the circles and then adhere to each other.
7. Now begin folding the boxes into shape using a bone folder. The fold lines are marked for you. Next adhere the side tab first as it makes it a bit easier to assemble. Be sure to take the other end of your bone folder and run it down the inside crease to insure a solid hold. Next use the adhesive to secure the bottom flaps. Let dry.
8. Now your ready to add your embelishments to each side of the goody bag. Let dry again and then fill with desired treats and trinkets.
Materials Needed:
Desired cardstock colors
Cricut Art Philosophy item #-Z1686
CTMH Exclusive Inks stamp pad item #-Z2105
2" Scallop Circle Punch item#- Z1392
1 1/4" Circle Punch item#- Z1311
Bonding Memories Glue item#- 1512
Bone Folder item#-Z1204
Cricut Art Philosophy item #-Z1686
CTMH Exclusive Inks stamp pad item #-Z2105
2" Scallop Circle Punch item#- Z1392
1 1/4" Circle Punch item#- Z1311
Bonding Memories Glue item#- 1512
Bone Folder item#-Z1204
Suggested Items:
My Acrylix Stamp Scrubber item#-Z1782
My Acrylix Spritz Cleaner item#-Z1778
My Acrylix Block 2" x 3 1/2" item#-Y1009
My Acrylix Spritz Cleaner item#-Z1778
My Acrylix Block 2" x 3 1/2" item#-Y1009
